

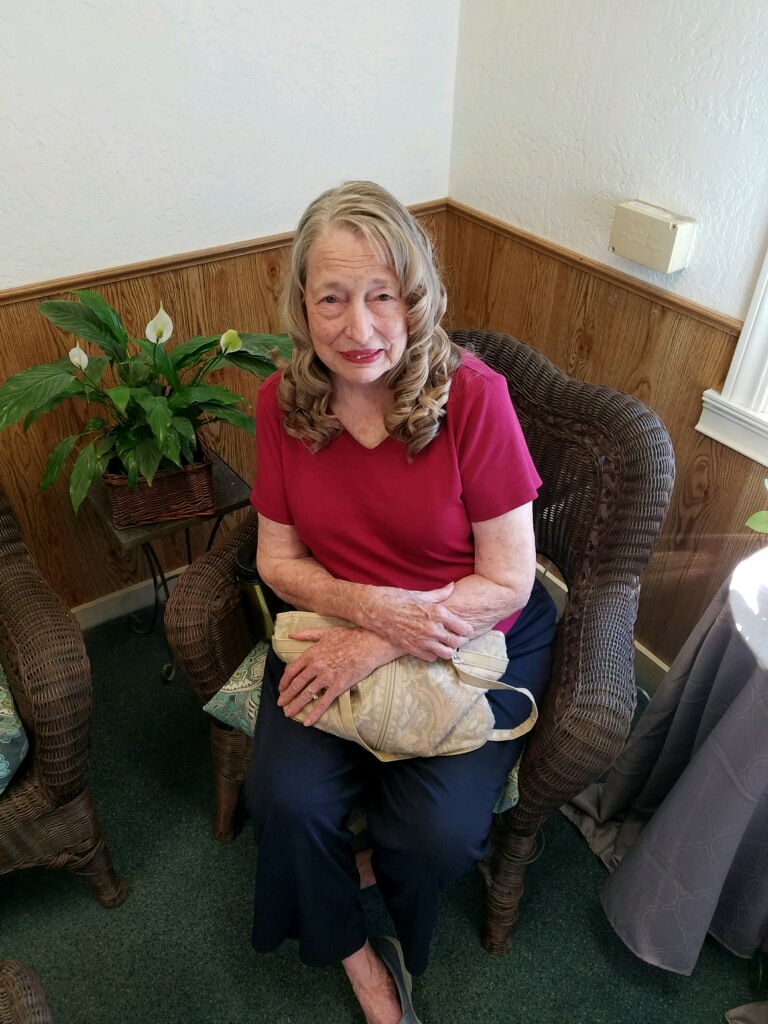
With great sorrow, the family of Barbara Birkett Small announces that she has joined her beloved husband Ken in heaven. She passed away while in hospice on February 20, 2022 following a fall at her home in San Andreas from a brain injury and complications from dementia.
Born Barbara Jane Bennett in Long Beach California, November 20, 1934, to Bard Irvington Bennett and Inez Beryl Doty, their first daughter.

Barbara met her first husband, Kenneth Dale Lunan one summer when she was visiting her Uncle Bob and Aunt Marg Doty in Iowa where Ken Lunan of Santa Monica was taking summer classes. They became engaged when they returned home to Southern California in the fall to resume school at UCLA. They were married in Long Beach in 1952. They went camping in lieu of a honeymoon and because of the Korean War they drove across the country to New York where Ken Lunan was stationed for scientific work for the Army. Barbara worked at a Catholic hospital in New York during the Korean War and for a medical laboratory. After the war, they relocated back to Southern California where Ken Lunan resumed his pursuit of his many degrees in science and chemistry, and they reenrolled at UCLA. She supported them both by working at a prestigious private laboratory in Beverly Hills as a phlebotomist and microbiologist where she met many celebrities while collecting their blood samples including the Marx brothers, Sidney Poitier and many others. Barbara made many life long friends in her biology classes at UCLA. Their first daughter Suzanne was born while they lived in Los Angeles, and they moved to Pasadena when Ken Lunan was enrolled in the PhD program at Cal Tech University when their second daughter Heather was born. When Ken graduated with his PhD in biochemistry, he was offered a job at Stanford research Institute and they moved the family to Sunnyvale, California.

Barbara was busy with family’s many camping and backpacking trips, sailing their 22’ Catalina in the San Francisco Bay and lakes throughout California, and in the Sea of Cortez. She supported her daughters in the local Brownies and Girl Scouts troops, she was the president of the PTA, and ran the library at Raynor Elementary school. Barbara and Ken Lunan took many classes on sailing and joined the Power Squadron.
Following her divorce from Ken Lunan, she worked at a local real estate office, Sunnyvale Realty. She met her second husband, Evelyn Bateson Birkett III, at a Power Squadron dance and they married at St. Lukes Episcopal Church in San Francisco, where Bateson attended and sang in the choir. They enjoyed dancing together and going to the Symphony in San Francisco, spending summers in the Delta on Bateson’s classic 54’ Chris Craft cabin cruiser, Cavalier III, and cruises and lunch parties on San Francisco Bay. She was sadly widowed after only 3 years of marriage when Bateson died suddenly from cancer.
Barbara and her daughter Heather moved to San Francisco in 1981 and lived aboard Cavalier berthed at the St Francis Yacht Club. After Heather‘s graduation from high school, Barbara sold Cavalier and they moved into an apartment on Chestnut Street.
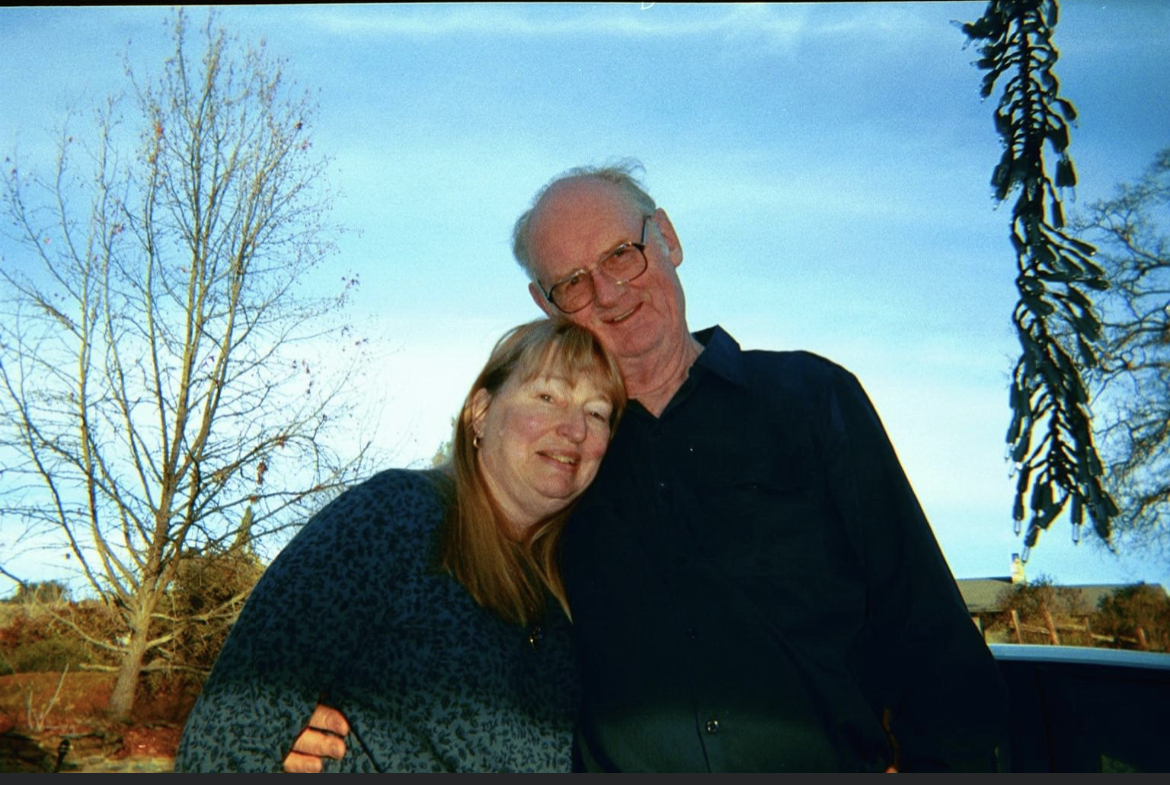
Barbara continued to attend St. Luke’s Church and in 1984 married Kenneth Thomas Small, who was a dear friend of her late husband, Bateson, and who sang with them in the St. Luke’s Choir. Barbara and Ken Small moved to an apartment on Russian Hill and Barbara began working for the city and County of San Francisco, first in their certification department, and then as a business analyst where she made many wonderful and dear friends, including her dear friend Tobe Bassoir (Katrin) whom she called the daughter of her heart. Barbara and Ken enjoyed travels to England and Canada and frequent visits to their timeshare in Lake Tahoe. They had season tickets to the San Francisco 49ers, the San Francisco Symphony and San Francisco Opera, where Ken Small performed as a child. Ken was a soloist for the Oakland Symphony chorus, and for Congregation Sherith Israel and Temple Emanu-El, and she attended all of his performances. They continued to sing together in the choir at St. Luke’s, where they had many loving friends in the congregation and especially in the choir. The St. Luke’s choir was very active and performed many celebrated concerts throughout San Francisco and made many recordings. They enjoyed playing cribbage, gin rummy, and Spite and Malice, watching the San Francisco Giants games, fine dining in San Francisco, especially at the House of Prime Rib where they had a cocktail every Thursday evening before choir rehearsal, and many wonderful meals from her kitchen as she was an accomplished cook and an exquisite hostess. They had many Superbowl parties with their friends, and family dinners with her daughters and Ken’s children and their families from his first marriage. They loved celebrating every Christmas with dinner in their Larkin Street home with their daughters and with their cherished friends, Bill and Sue Blomberg, and especially the party Sue Blomberg held for the St. Luke’s choir every Christmas Eve.

Upon her retirement, Barbara and Ken moved to their quail hollow home among the oak trees in San Andreas. They enjoyed the quiet country life together, always snuggling on the couch like newlyweds, listening to the Met opera broadcasts, and watching sports on television. Cooking, gardening and birdwatching were her passions. She loved researching family genealogy which went back to Edward Doty on the Mayflower, and staying connected with her first cousins in Harkers Creek West Virginia and their genealogy society. They celebrated 29 loving years together before Ken’s passing in 2013 of Alzheimer’s. She never left his side during his illness, and, after his death, never stopped missing Ken and her thoughts were always about him.

In 2014, her daughter Suzanne joined her in San Andreas and they enjoyed watching the birds and wildlife in the garden that she created and lovingly tended, cooking together, watching baseball, and playing with their cat Christopher. Sadly, in 2015 she developed dementia but still enjoyed being in her beautiful home and garden until her passing.
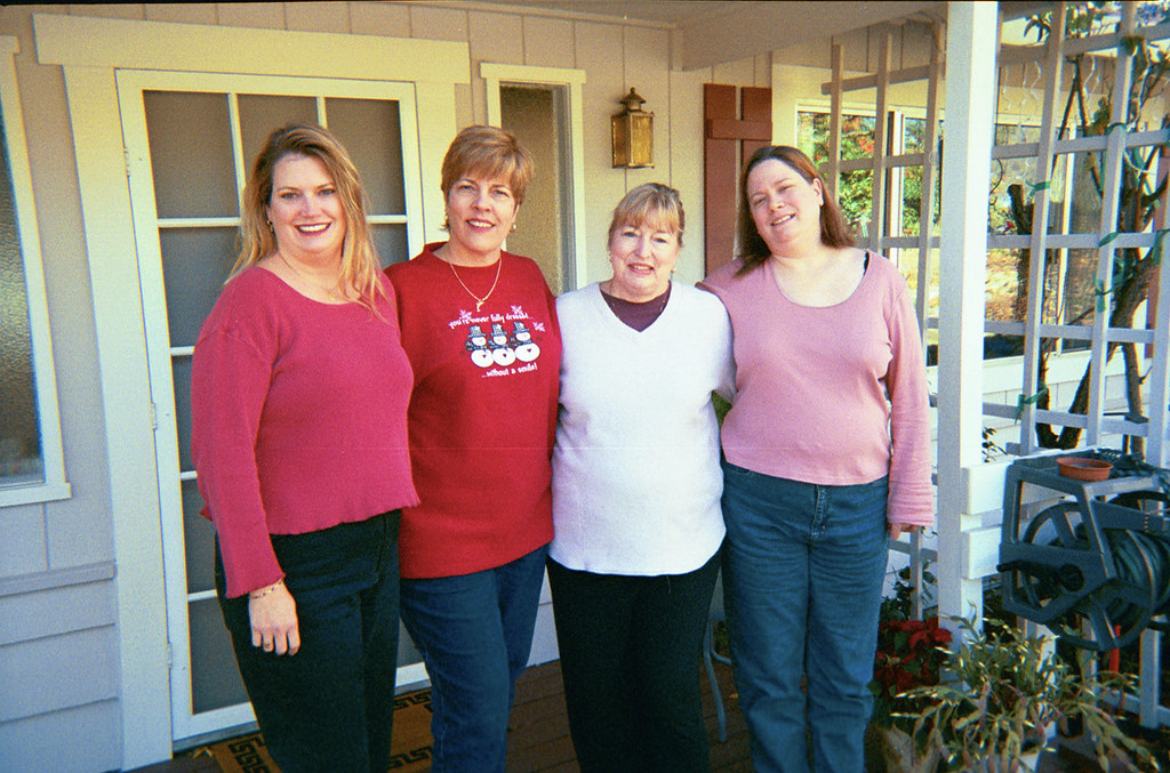
In addition to her beloved daughters, Suzanne Lunan and Heather Lunan she is survived by her brother Bard Bennett (Linda) and her sister Belinda Eastwood (David), and their children, her nephews Rob Watson (Patty) and Scott Watson, and David’s daughters Stephanie Scott (Jim), and Carrie Eastwood, who passed in 2017. She loved her family and always wished that they weren’t so separated by geography.
There will be a private ceremony and scattering of her ashes on the San Francisco Bay. She was so loved and will be eternally missed. Life is what you make of it, so live, laugh, love.


